The use of proxy has become a common task because it bypasses content restrictions that you might be facing while residing in a particular region. It will enable you to access content that isn’t even available for users from your region.
However, the problem comes when you have to set up a proxy in Windows 10. Many people use VPN programs online directly in their browsers. While some want to change their IP address by using proxy settings in their Windows system.
This is where you will find this blog beneficial and helpful. In this guide, we will share all methods to set up a proxy in your Windows 10 device. It will help you learn all possible ways step by step for a better understanding of what to do and how to do it.
How to Setup Proxy in Windows 10?
Whether you are trying to set up a datacenter proxy or residential proxy, you will have three major ways to do this using the built-in settings of your Windows 10 system. It is pretty simple to follow these methods if you are familiar with the control panel of your system.
However, if you aren’t well aware of this section, you should have to struggle with the selection of the appropriate settings. Here, we have listed the methods in a step-by-step manner to let you know how to go ahead with this process and set up a proxy in your system.
Automatic Proxy Setup
Microsoft has introduced the automatic proxy setup process in Windows 10. With this setting, the system will automatically search for a proxy network and set it for your system. You don’t have to provide any specific details to go ahead with this process.
The only thing you have to do is to turn on an automatic proxy setup from the control panel of your system. If you don’t know, follow the below-mentioned steps.
Step 1. Use the “Start” button to open the menu and choose “Settings”.
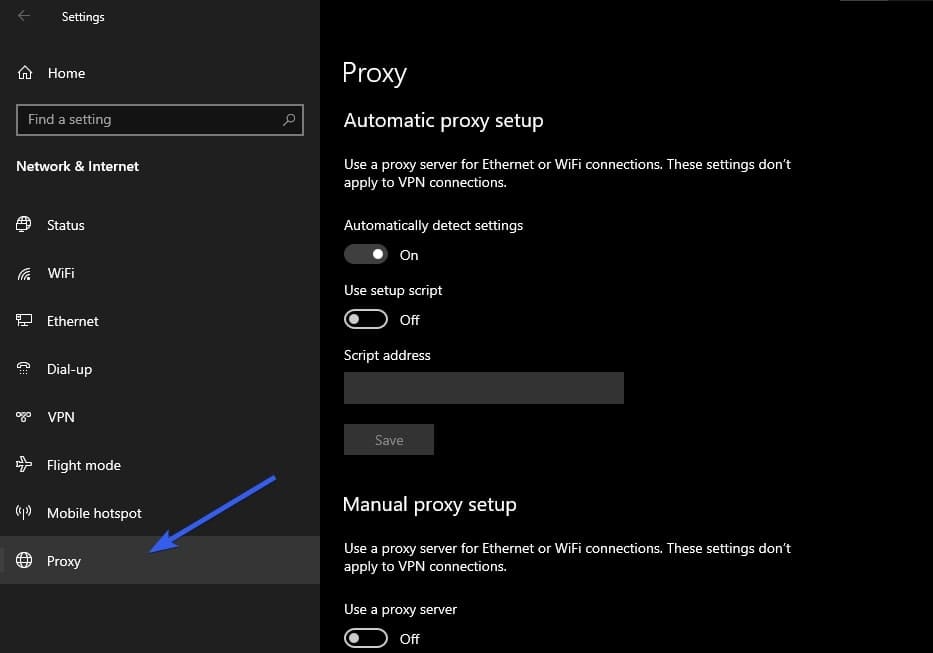
Step 2. From the main screen, go to “Network & Internet” and choose “Proxy” from the newly opened window.
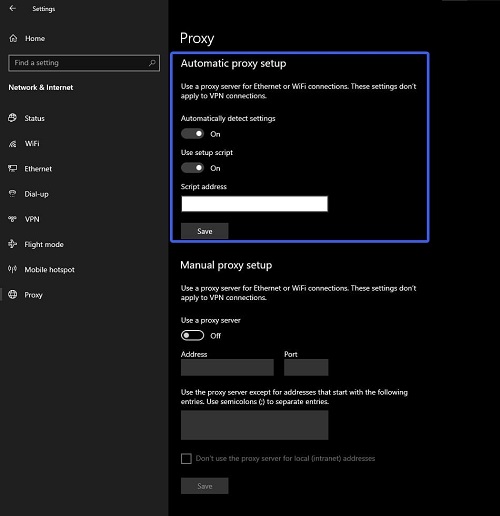
Step 3. Look for “Automatic Proxy Setup” on the bigger screen and turn on the “Automatically detect settings” option.
Once you have turned it on, you only need to click on the “Save” button to complete this process. Your system will take a few seconds to automatically configure the proxy server settings and connect your device with it.
Manual Proxy Setup
For some users, automatic proxy setup isn’t enough because they need a consistent connection with smooth speed. If you also stand among those and looking to add a manual proxy in your system having Windows 10, you have come to the right place.
In this section, we will share how you can go ahead with this process and manually enter your proxy details in your system. Let u show you the exact steps to follow.
Step 1. Go to “Settings” and choose “Network & Internet” from the options.
Step 2. Choose “Proxy” from the available options.
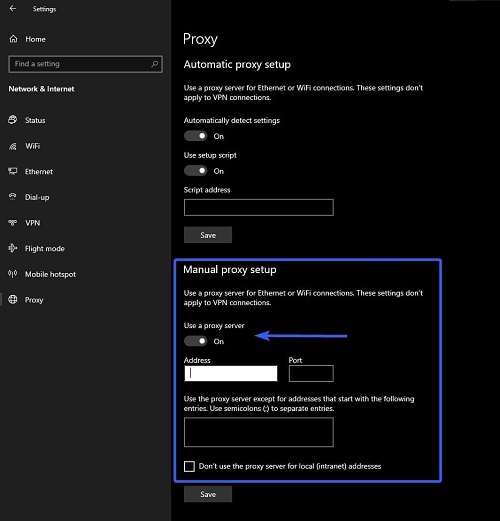
Step 3. Turn on the button shown below “Manual Proxy Setup”.
Step 4. Enter the proxy server’s details which are “Address” and “Port”.
Step 5. Paste the website link in the excluding box and save the settings.
After successful addition, it may take a few seconds to process your request. Once it is processed, your system traffic will be routed through the proxy server instead of sending direct requests for data access.
Using a Script
Normally, users go ahead with the above two methods because they don’t use proxy scripts. However, some organizations demand their users to use a specific script to be connected with a proxy server. If you are in such a situation, no need to worry.
This section will help you learn how to configure proxy setup with the help of a script in Windows 10.
Step 1. Go to “Settings” and choose “Network & Internet”.
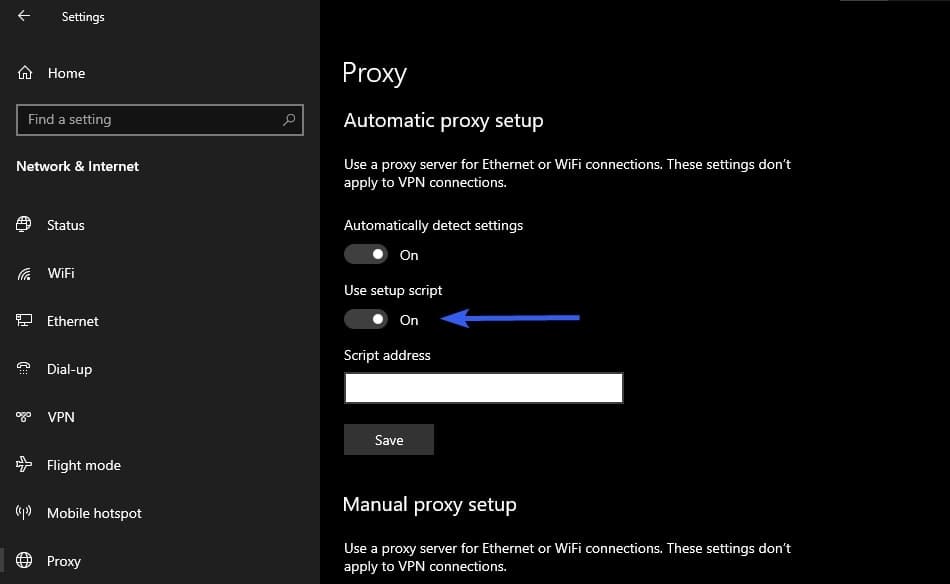
Step 2. From the “Proxy” section, enable “Automatic detect settings” and “Use setup script”.
Step 3. Enter the script address in the given box and click on the “Save” button.
It will take a few minutes to fetch the script and redirect the traffic to the proxy server. Be mindful that it can be dangerous if you are using a random script which cause you data loss. So, it is recommended to be careful while using this method and connecting to a proxy server.
Choose the Best Proxy for Windows 10
So far, you have read about the methods to follow to set up a proxy in Windows 10. But you might be struggling to find the right proxy for your system. Keep in mind that you have to consider multiple factors like speed, reliability, safety, and cost while choosing a proxy network for your system.
If you haven’t found the right one even after analyzing multiple ones, you should try Belurk. It is a perfect pick for those who are looking for an effective proxy solution for their internet browsing. This proxy will help you bypass the content restrictions regardless of the reason why they have been applied.
Because of its multiple benefits and premium facilities, it is considered the best miniproxy alternative too. So, you should get this proxy setup and use it to browse the internet anonymously without being caught by the platform or anyone on the internet.
Summary
By reading this blog, we hope you have learned the right methods to set up a proxy in Windows 10. We have discussed all those methods that you can use with your system. Despite this, we have also researched to find the best proxy network for you.
It is highly recommended to get this set up for smooth and fast connectivity with the internet. This proxy network will surely help you bypass the restrictions and access content without being identified on the internet.


